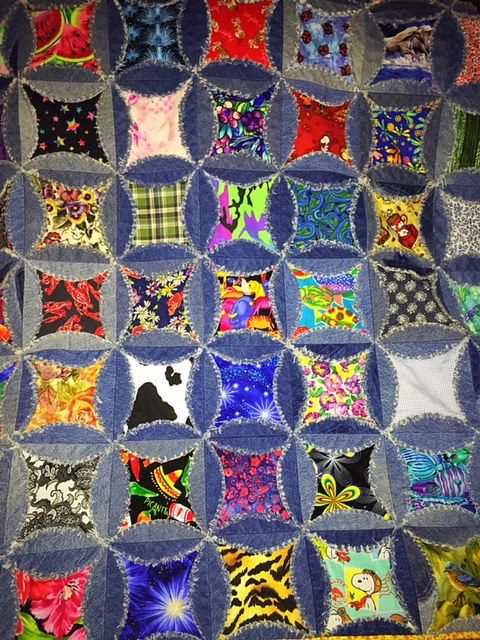
Here’s a super cute denim I spy rag quilt I made last week. This quilt is made from my husband’s old jeans so I’m calling this quilt, “The Fart Quilt”. What a perfect quilt name! I didn’t have a pattern for this quilt and just winged it but I couldn’t be happier with the results. See how the edges are frayed? That’s what makes this a “rag quilt”. The quilt is also an “I Spy” quilt because every cotton fabric square in the quilt is different, there aren’t any repeating fabrics.
Table of Contents
This Rag Quilt Makes a Great Gift
I made this quilt for my daughter #2, she’d been asking me to make her a quilt, I had a big stack of jeans just sitting there so I came up with this Denim I Spy Rag Quilt. I ended up finishing the quilt the night of daughter #2’s 20th birthday, it was just perfect timing!
If you like my denim rag quilt,
please feel free to share it on social media.
I’d really appreciate it!
How to Make a Denim I Spy Rag Quilt
Before you start this easy quilt project I recommend you figure out how big you want your rag quilt to be and how many denim circles you will need. I decided to make this quilt 9 rows across and 14 rows long. You will have to take into consideration the size of the circles you are going to be cutting out and how many pairs of jeans you have on hand for this project.
What Do You Need To Make This Quilt?
- Sewing machine
- Pins
- Thread
- Lots of old jeans
- Contracting colorful cotton fabric. If you want the quilt to be an I Spy quilt as I made, then you’ll need a different fabric for each square.
- Sharp Scissors
- Cutting Board
- Rotary Cutter
- Acrylic Ruler
- Pasta Bowl, or a bowl the size of your liking
- Marker or Pen
- Manila File or Cereal Box
- Iron & Ironing Board
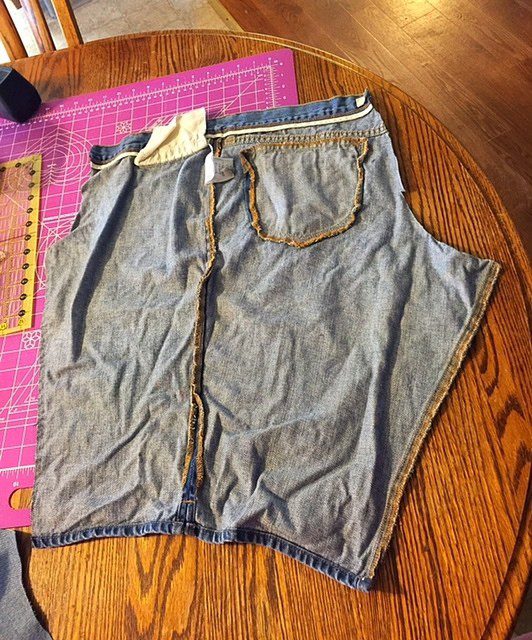
To make this rag quilt or one similar to it, you are going to need a stack of old jeans that need repurposing. The first thing I did was cut up right along the inseam of the jeans from the ankle up to the crotch and then up by the zipper and through the waistband. Repeat with both legs and then cut up through the seat of the jeans and you’ll have two nice pieces of flat denim to work with.
Here’s a picture of some Old Navy long walking shorts that I cut up for this rag quilt pattern, they are wrinkly and if I was going to use these for a project I would iron them before marking and cutting shapes out. They are women’s size 12. See how much denim there is to work with once the jeans are cut open and laying out flat?
How to Cut Out Denim Circles for Quilt
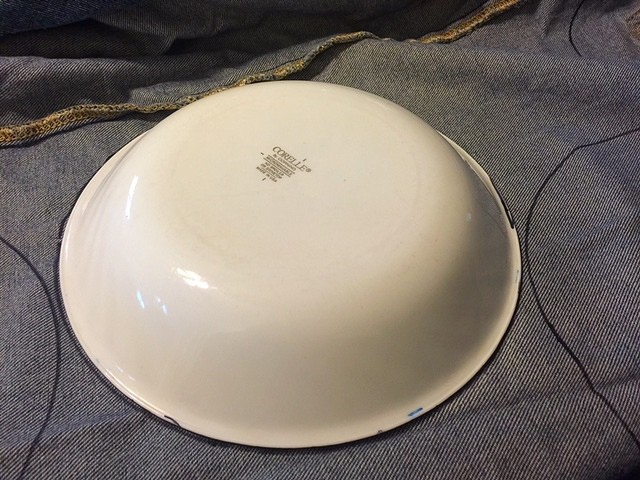
I used a Corelle pasta bowl from my cupboard. This is a bowl we actually eat out of. I picked this bowl because I didn’t want my circles to be too small and the bowl is really easy to handle. I laid the bowl on the denim and used a sharpie to mark the wrong side of the fabric (inside the jeans).
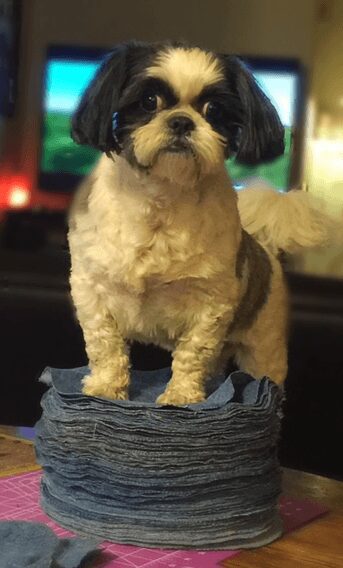
I then cut out a bunch of circles. Here’s what a fat stack of 126 denim circles looks like.
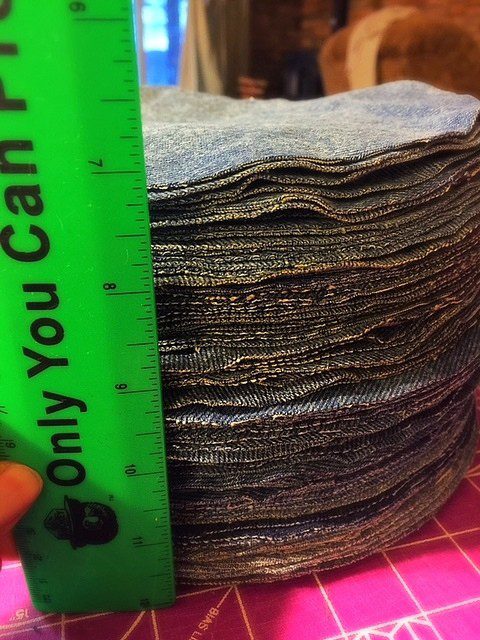
Here’s a much cuter picture of what 126 denim circles looks like.
Marking Circles (Sewing Lines)
I figured out what size square would fit inside the circle. I’ve explained my process for doing this on one of my cute denim potholder posts and have included a photo there. I folded a denim circle in half and then folded that half in half again. I then used an acrylic ruler to figure out the size of the square that would fit inside the circle and then I made the square 1/4″ smaller. I made a template square out of a manila file, a cereal box would work too. My squares are just under 6″.
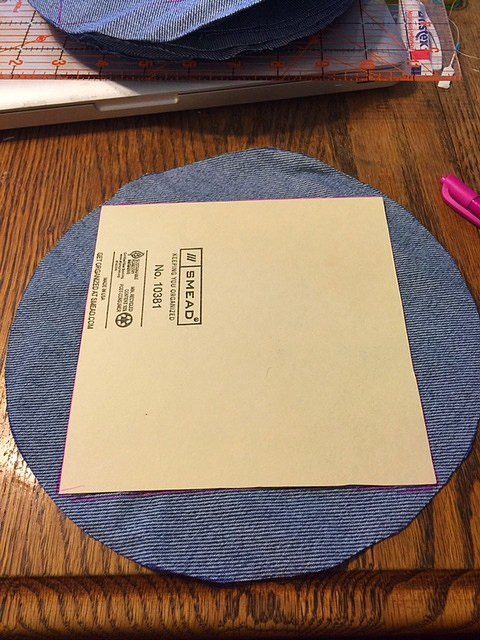
I then marked HALF of the circles in the stack with the square template. I used a brightly colored pen so I could easily see the squares I had marked. You need to be able to see the lines clearly because you will be sewing on these lines.
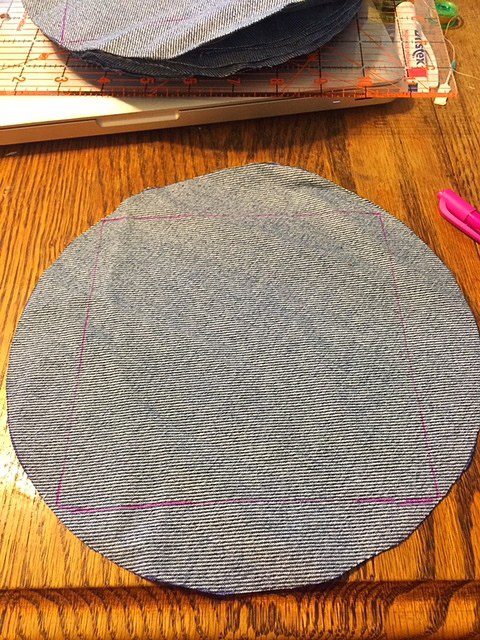
I then attached the circles together. I attached one marked circle to an unmarked circle. I chain-pieced the circles and did a back and forth stitch at the beginning and end of every fabric circle. This quilt is very heavy so I wanted to make it extra sturdy. First, I attached two circles together, then I added “two” two circle units together to make strips of four circles.
Here’s a Tip For Joining Circles – Piecing the Rag Quilt
When adding the two sets of two circles together, take the time to make sure the circles physically line up with each other. After you line up the units, hold the top center of the circles you are wanting to sew together by pinching them together with two fingers and letting them hang, if your seams aren’t lining up, adjust them and repeat the pinching and hanging process, when they look like they are lined up right, pin them together.
You want to make sure the seams of the sets of two line up with each other so you will have straight rows. When I did this process I joined one marked circle with one unmarked circle, following the sewing line of the marked circle. I continued this process until I had nine long rows of 14 circles joined.
Sewing Rows Together
I pressed the circle flaps open with a hot iron.
Now it’s time to attach the rows together. Keep in mind only every other block is marked, so you’ll have to now get a ruler and mark every other circle so you have a sewing line to follow. This is very easy to do, just line a ruler up with the lines that are already marked. Make sure your lines go into the circle joining seams just a little.
In this photo below, I had just finished marking the bottom row, by using a ruler to fill in the lines on squares that were not marked. In the row at the bottom see how the lines go into the seams where the circles were joined? This is what you want. Keep in mind, you only have to mark half the rows! A marked row will be attached to an unmarked row.
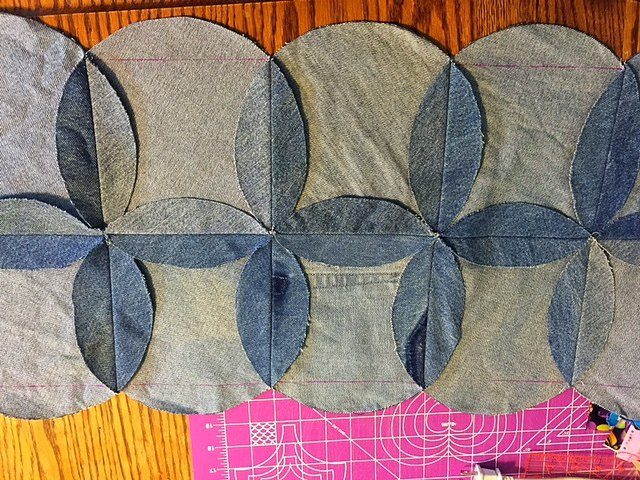
Here’s another picture of joining rows. I pinned the rows together and made sure the seams lined up and the top of the circles lined up. When I came to a seam I put the sewing machine in reverse to go back over the seam and then went forward again. Again, I did this because I want to the quilt to be extra strong because it’s so heavy. I did this at every seam joining.
I sewed the strips into two large pieces. I didn’t join the entire rag quilt because I didn’t want to struggle with pushing the entire quilt through my sewing machine when attaching the I spy fabric squares.
I Cheated and Bought Precut Fabric Squares
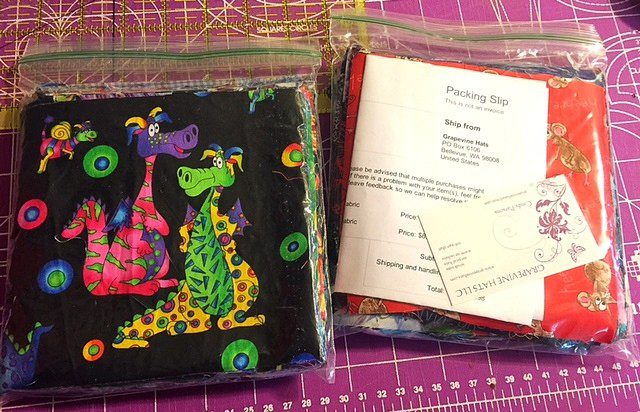
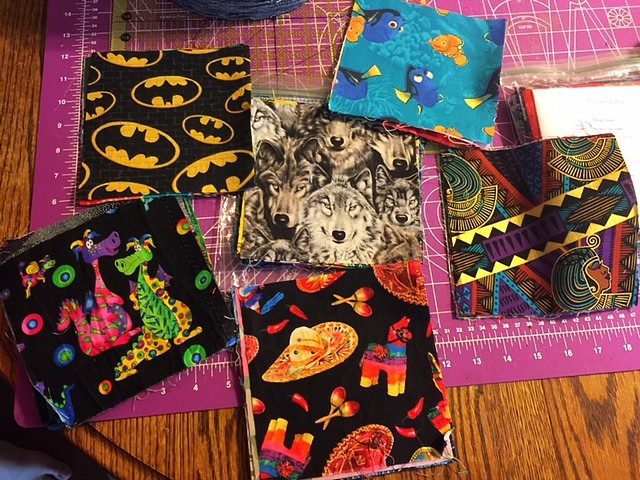
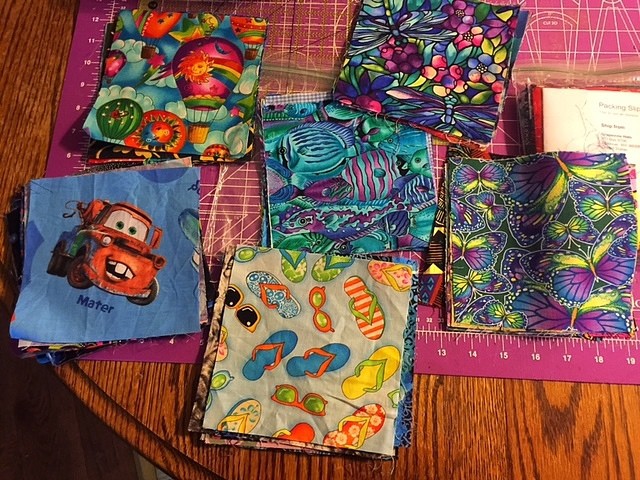
Before I started piecing this I spy denim rag quilt I decided to order the I Spy fabric squares from eBay. I didn’t feel like pulling 126 fabrics from my stash and ironing and then cutting out one square from each fabric. This is my second time ordering fabric squares from eBay, I did the same thing when I made this sweet I spy baby quilt.
Here are some of the eBay fabric squares I received in the mail. Here’s the website of the eBay seller I purchased these squares from – Grapevine Hats. Here’s a link to her eBay store. She makes custom surgical hats for medical professionals, I guess these squares are her scraps? This worked out well for her and me!
Tips for Pinning Fabric Squares to Denim
Now it’s to pin the I spy fabric squares to the quilt. I will say the pinning was very easy, but I was poked by pins A LOT! I recommend wearing an old tee shirt for this step. The pins grabbed my tee shirt and now it has small holes. Aww, the price I paid for such a cool quilt. 😀
I worked in rows of three. Below, you can see I inserted the I spy fabric squares into the wrong side of the quilt circles. I had my iron on hot, then I placed a fabric square in the center of a circle, press it down with the iron, this helps make the fabric squares not have puckers. Then I’d slide a large acrylic ruler under the quilt (so I wouldn’t pin to my ironing board) while the quilt was still on my ironing board and pinned the fabric squares under the denim flaps. I’d press a few fabric squares into place and then pin, repeat repeat repeat until I had three rows pinned done. As you can see below I only pinned the fabric squares down vertically or on two opposite sides (NOT on all four sides). For now, the stitching will lock the fabric down on two sides.
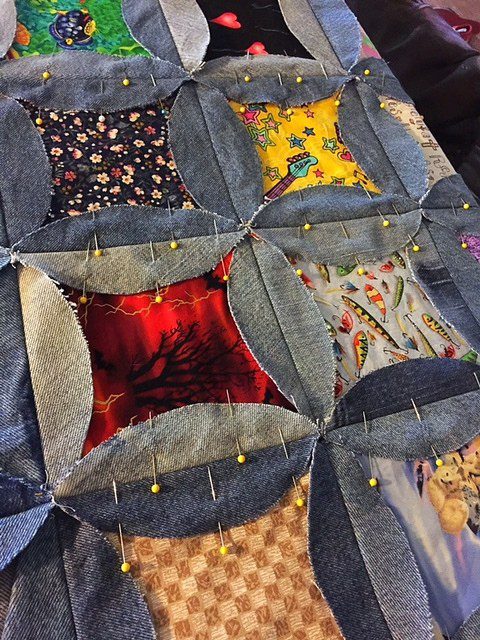
Sewing Denim Flaps Down (Locks in Cotton Squares)
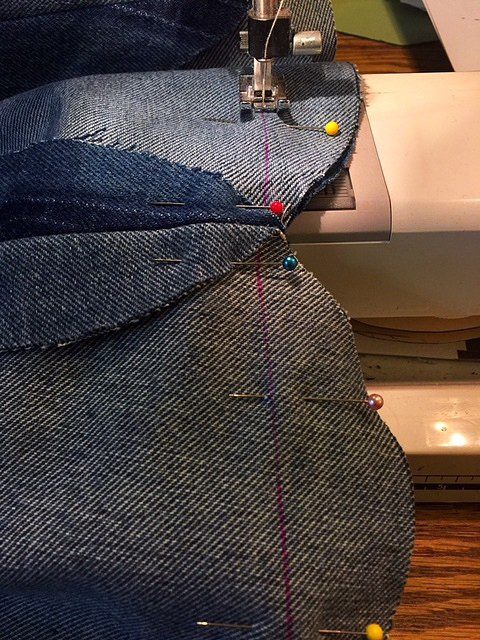
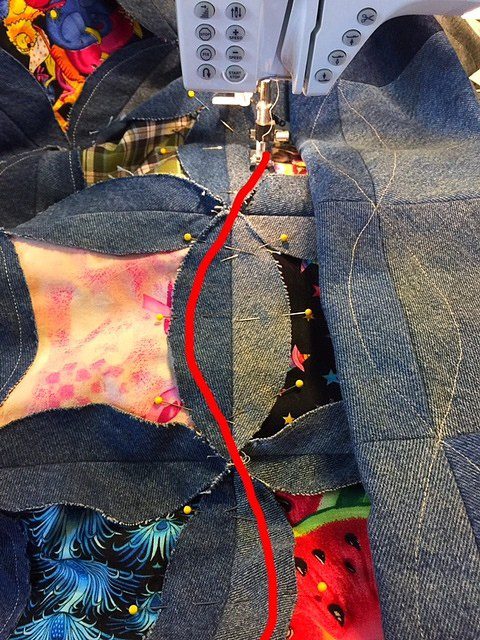
Now it’s time to stitch the flaps down! I had my sewing machine needle in the middle position and then lined up the outside of my sewing foot on the edge of the fabric. You will be using both sides of your sewing foot to line up with the denim flaps. Keep in mind, when you approach the center where four denim circles meet, you will have to sew in the center of the joining so you won’t necessarily be using your sewing foot as a guide in the centers.
Here’s how I stitched the flaps down. I drew a red line on the image with my finger on my cell phone, but I think you get the idea. I found out that if I put the pins in sideways like what you see in the picture below, I was pinpricked less.
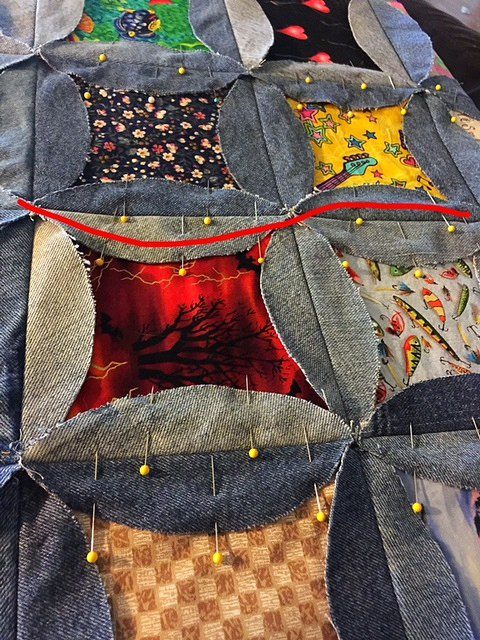
Repeat this with all the rows of the quilt.
Denim Rag Quilt Recap
Hopefully, This Will Make What I Did More Understandable
- Pin and then stitch the vertical rows down in manageable batches, I chose to do three rows at a time. I say manageable sections because if you try and do too many rows at once you will get pin poked a lot.
- Then pin and stitch the horizontal rows down. Take time to smooth the I spy fabric in place so there aren’t any puckers. Use the iron to help you if necessary. I did!
- I did all pinning on my ironing board with an acrylic ruler slide under the quilt so I wouldn’t pin the quilt to the ironing board.
Here’s what the quilt looks like at this stage.
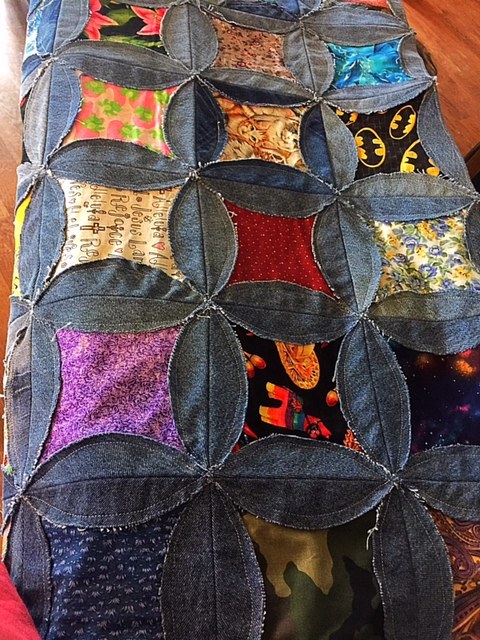
A closeup. Can tell the llama pinata is my favorite fabric square?
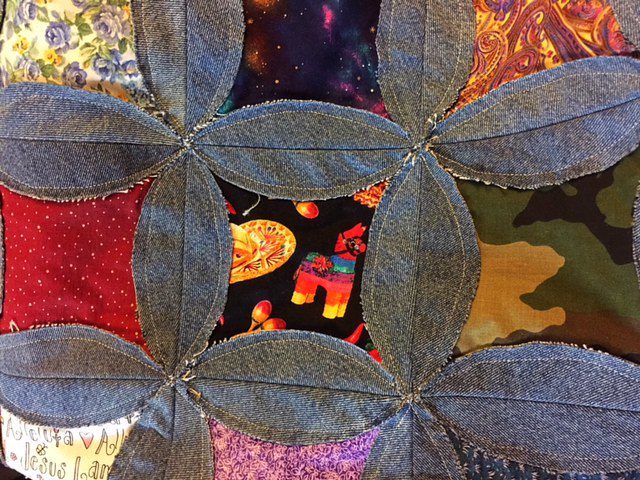
Next, I stitched around the outside of the quilt, again to make the quilt nice and strong. My seam allowance was less than 1/4″ I didn’t want this stitching showing after the binding is attached.
Attaching the Binding
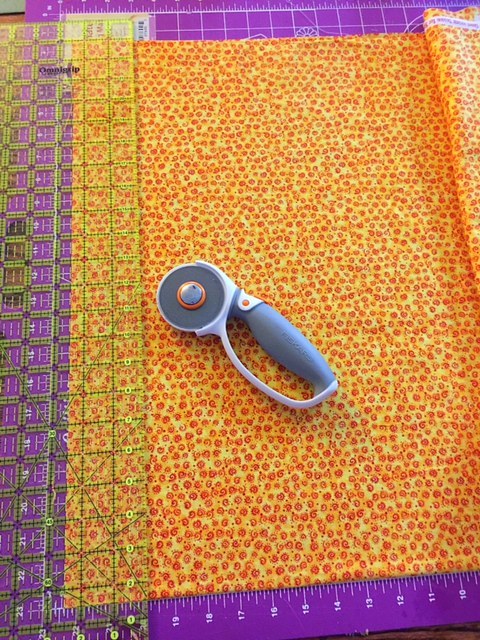
I then prepared the binding. My daughter #2, who this quilt was made for, picked this funky yellow fabric out of my stash for the binding. I cut the binding strips 2.5″ wide, I attached all the strips into one long strip, then I pressed the strip wrong sides together. I attached the raw edge of the binding to the outside edge of the quilt, on the right side of the quilt using a 1/4″ seam allowance.
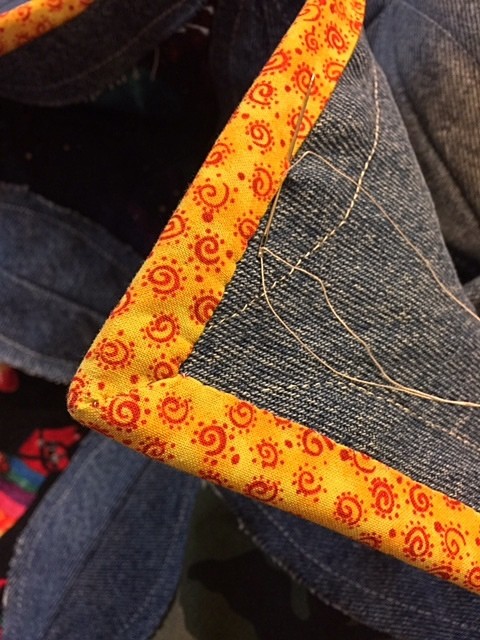
Then I flipped the quilt over so the backside was up. I folded the binding over and hand-stitched the binding down. I only pin the binding down using two pins. I don’t like to pin too far ahead because I find I end up getting pin poked too much. I found a few of the denim fabrics were especially hard to hand stitch through but most denim parts were really easy.
Cutting Seam Allowances – This is What Makes This Quilt a Rag Quilt
After the binding was done, it was time for me to cut into the seam allowances of the denim circles, which are now squares. To make this job quick and easy I purchased some spring loaded scissors from Amazon. I used these scissors to snip into the edges of the quilt.
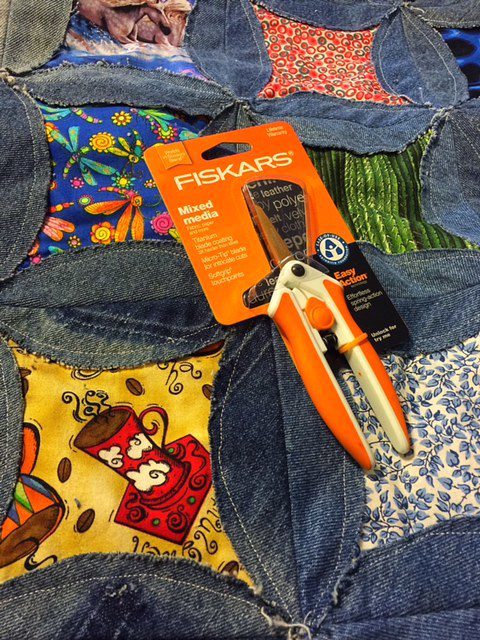
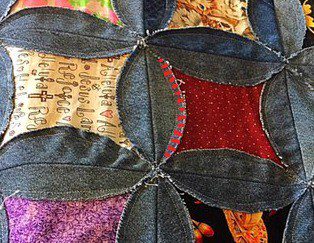
Here’s an example of how I snipped in the seams. I was very careful NOT to snip into the stitching or the I Spy fabric.
Wash the Quilt to Create the Fraying
When I got the quilt seam snipping done, I tossed the quilt into the washing machine. I washed it twice (my washing cycle only takes 35 minutes because we have a Speed Queen) and removed the lint from the fraying between washing cycles.
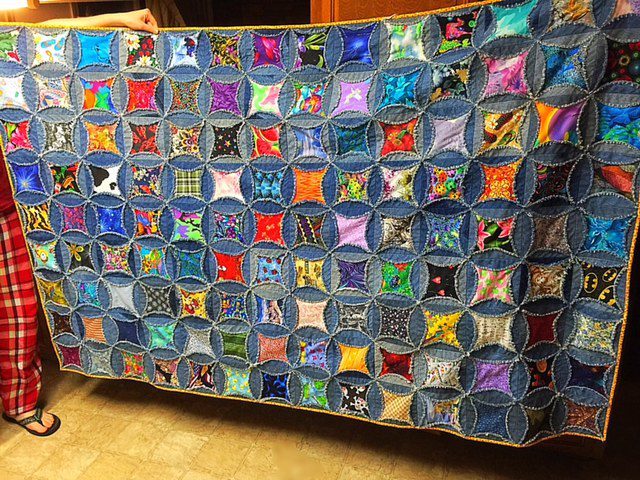
Heres My Beautiful Denim I Spy Rag Quilt
It turned out amazing! It’s a real stunner in person.
I really need to take it outside and get some better pictures.
I hope you enjoyed this little tutorial. I tried to explain the process I used to create this easy rag quilt but if you have any questions, or if I didn’t explain anything well enough please don’t hesitate to leave me a comment and I will get back to you with an answer!
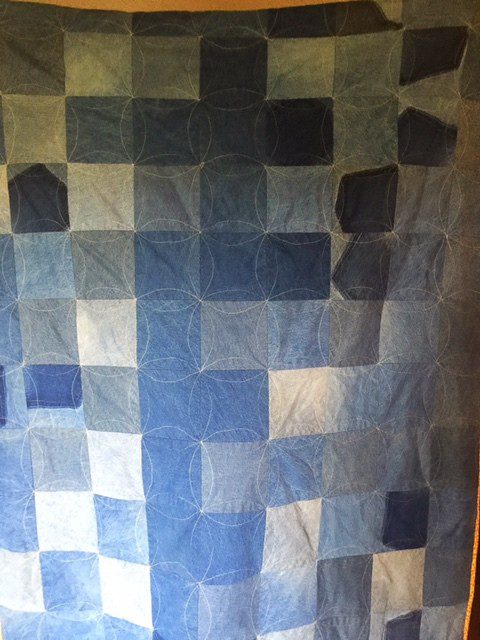
View of Back Side of Quilt
Here’s a picture of the back of the quilt. It’s raining outside so the lighting isn’t the best. The darkest denim squares are the seat of the jeans with the back pocket removed.
If you like my denim rag quilt,
please feel free to share it on social media.
I’d really appreciate it!
Be Sure to Check out These Quick Denim Potholder Tutorials
- Reverse Applique Denim Potholder
- Square Denim Upcycled Potholders
- Denim Potholders with Finger Protectors Tutorial
Are You Hungry After Making This Epic Quilt?
- Try this Better Than Take-Out Rice Cooker Chinese Fried Rice
- The Best Linguica Sandwich Recipe
- The Best Homemade Chili Recipe
- Quick Candy Pecans Stovetop Recipe
Disclosure: This post contains Amazon affiliate links.
I am participating in the #atozchallenge and this Denim Rag Quilt post is my “D” post. 😀
Patti @Bears by Bub
Saturday 16th of March 2024
Hi, I was wondering if I could make this without making it a rag quilt? still using the circles and I Spy idea. Thanks
JoAnn
Sunday 14th of January 2024
I just took a class yesterday on the cathedral pattern, we used a washable glue stick instead of pins, just a hint. My question is we’re is the batting and the backing?
Creati un cont personal
Saturday 13th of January 2024
Thanks for sharing. I read many of your blog posts, cool, your blog is very good. https://www.binance.info/ro/join?ref=P9L9FQKY
Demarice Zemke
Saturday 25th of November 2023
I used bo nash fusible powder and put a little bit under the colored square and ironed it, then sprinkled some under each flap on top of the fabric and ironed once again...it was so nice and easy with no pins at all!
Josie
Monday 6th of November 2023
I love how the quilt ends up self-backed! And it's such heavy fabric, it doesn't need any batting! Just brilliant!